
Step-by-Step Guide on How to Configure a Private Nginx Server in AWS using Ansible


Table of contents
- Prerequisites
- Getting Started
- Step One: Create a VPC
- Step Two: Launch two Private Instances
- Step Three: Create a Bastion Host
- Step Four: Time to Connect
- Step Five: Install and Setup Ansible
- Step Six: Create Target Groups
- Step Seven: Create an Application Load Balancer
- Step Eight: Configure the Instance Security Group to direct to the Load Balancer
- Conclusion
- Credits
AWS is a cloud-based platform that offers flexible and cost-efficient computing solutions. It provides various services, such as computing power, storage options, and databases that help businesses increase their capacity and expand. With AWS, companies can quickly scale their operations and grow their businesses.
On the other hand, Ansible is a software tool that allows users to automate various tasks such as managing configurations, deploying applications, and automating other processes. With Ansible, you can automate repetitive tasks and manage complex environments with many servers and different operating systems. It is easy to use, as it does not require any agent software to be installed on the remote systems and can be run from a central location.
I completed this project as part of the AltSchool Christmas Holiday Challenge in 2022.
This article explains how to set up private servers using Nginx and Ansible on AWS, with a focus on configuring two servers for simplicity. However, the method can be scaled to accommodate more servers.
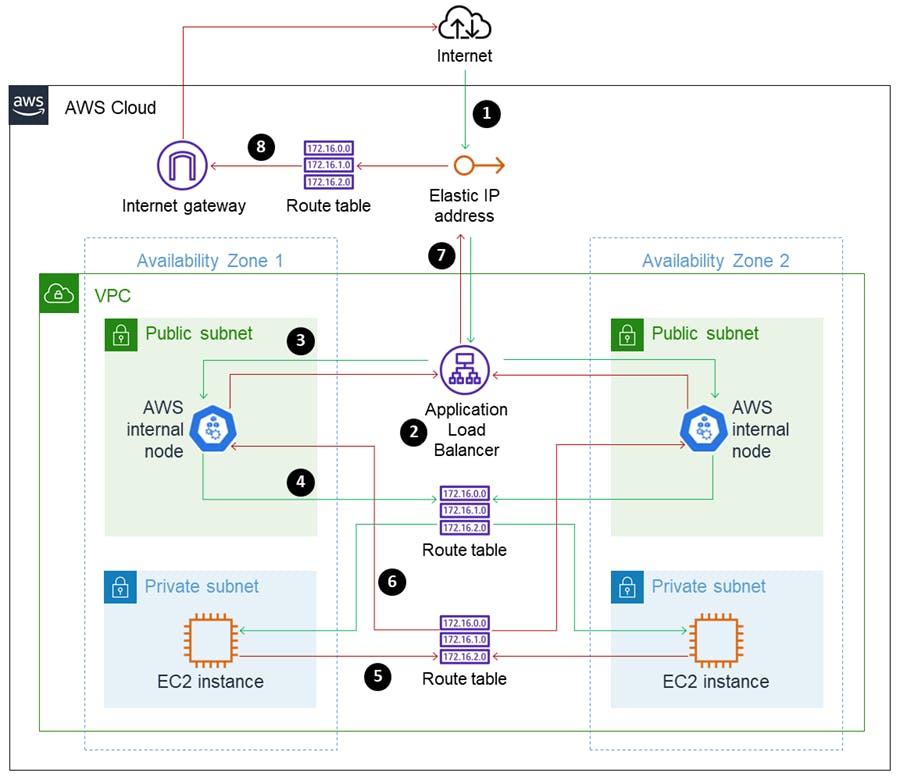
This illustration provides a general overview of the infrastructure that will be set up by the end of this tutorial. Don't worry about the terms that you're not familiar with; we'll go through them step by step.
Please refer back to the image for visual reference as we move through this tutorial.
Prerequisites
An AWS account
A local machine, e.g a laptop
Git bash for Windows users
Some experience with Ubuntu
Getting Started
Step One: Create a VPC
What is VPC? A virtual private cloud (VPC) is a secure, isolated private cloud hosted within a public cloud.
Open the Amazon VPC console at https://console.aws.amazon.com/vpc/
On the VPC Dashboard, click the
Create VPCbutton.
On the VPC configuration Dashboard,
A. Choose
VPC and More.This option automatically launches private subnets, public subnets, route tables, Internet Gateway, Availability Zones, Network Access Translator (NAT) Gateway, and others.
Subnet: A subnet is a way to divide a larger network into smaller, more manageable sections. It's used to organize and control the flow of data within a network, and to increase security and organization.
Route table: A route table is like a map for data packets in a network. It helps routers to decide where to send the data packets next by looking up the destination address.
Internet Gateway: An Internet gateway is a device or service that connects a local network, such as a home or office network, to the Internet.
Availability Zones (AZs): Availability Zones (AZs) are separate locations within a region that are designed to keep running even if something bad happens in one of the locations.
NAT Gateway: NAT gateway is a virtual firewall that sits in between a private network and the internet.
It's important to note that these concepts can be quite complex and have many nuances and details that have been omitted in the simplifications. It's always a good idea to consult more detailed resources and documentation to gain a deeper understanding of these concepts.
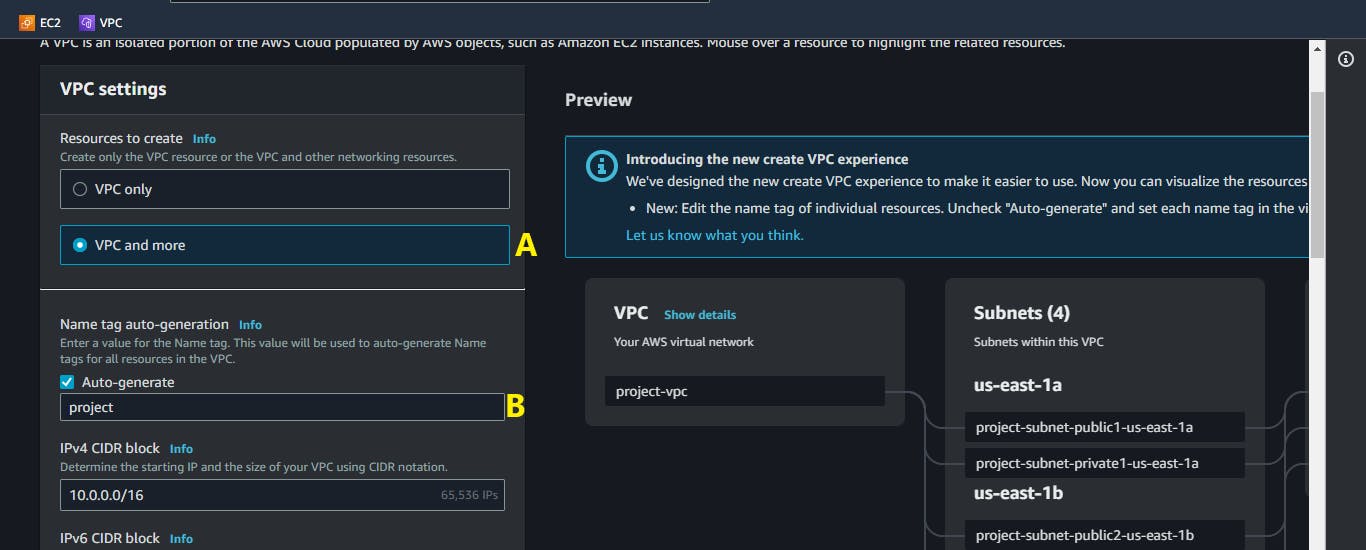
B. Edit the Name tag for your VPC.
C. Choose the number of Availability Zones (AZs) in which to create your NAT GateWay.

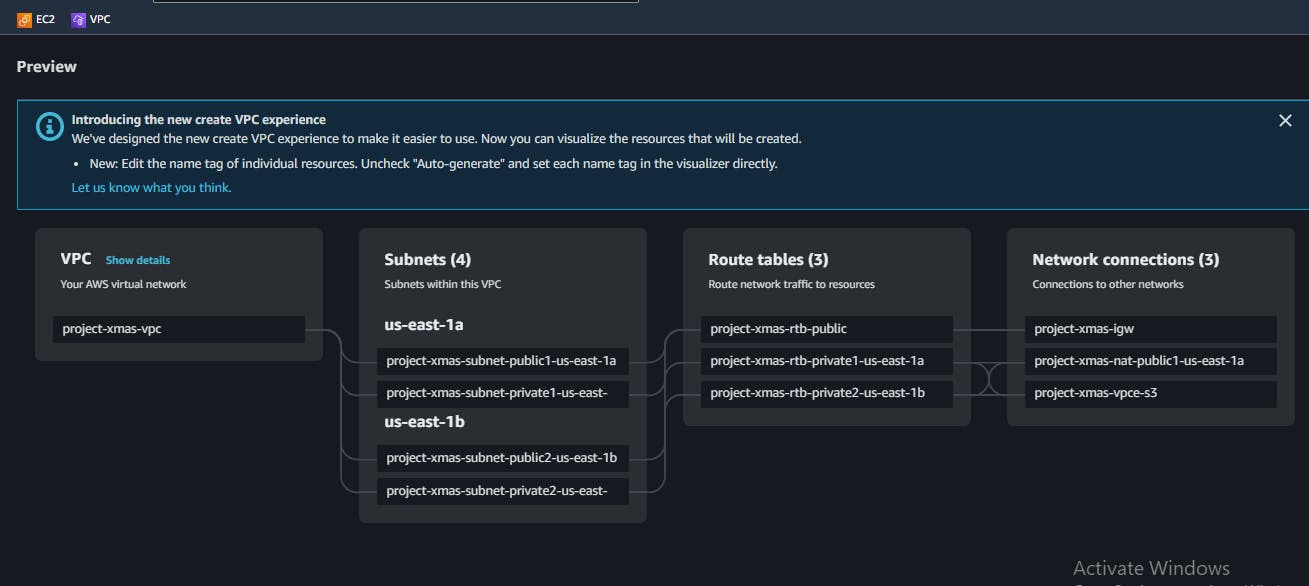
D. Click on the
Create VPCbuttonThe image below shows the auto-generated configurations i.e.. Subnets, Routes Tables and Network Connections.
Step Two: Launch two Private Instances
Open AWS EC2 console at https://console.aws.amazon.com/ec2/
Click on
Launch Instance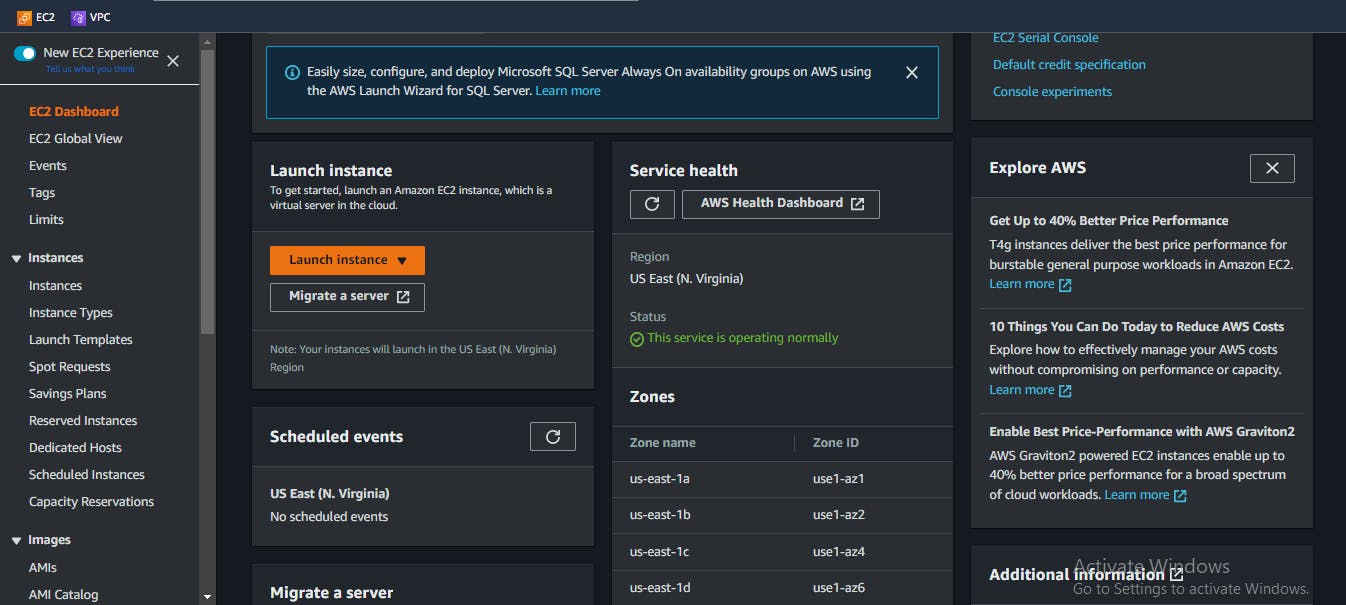
On the Launch an instance page:
A. Write a name for your servers, this is entirely up to you
B. Select the number of instances
C. Use Ubuntu as the Linux Distribution [for the sake of the tutorial]
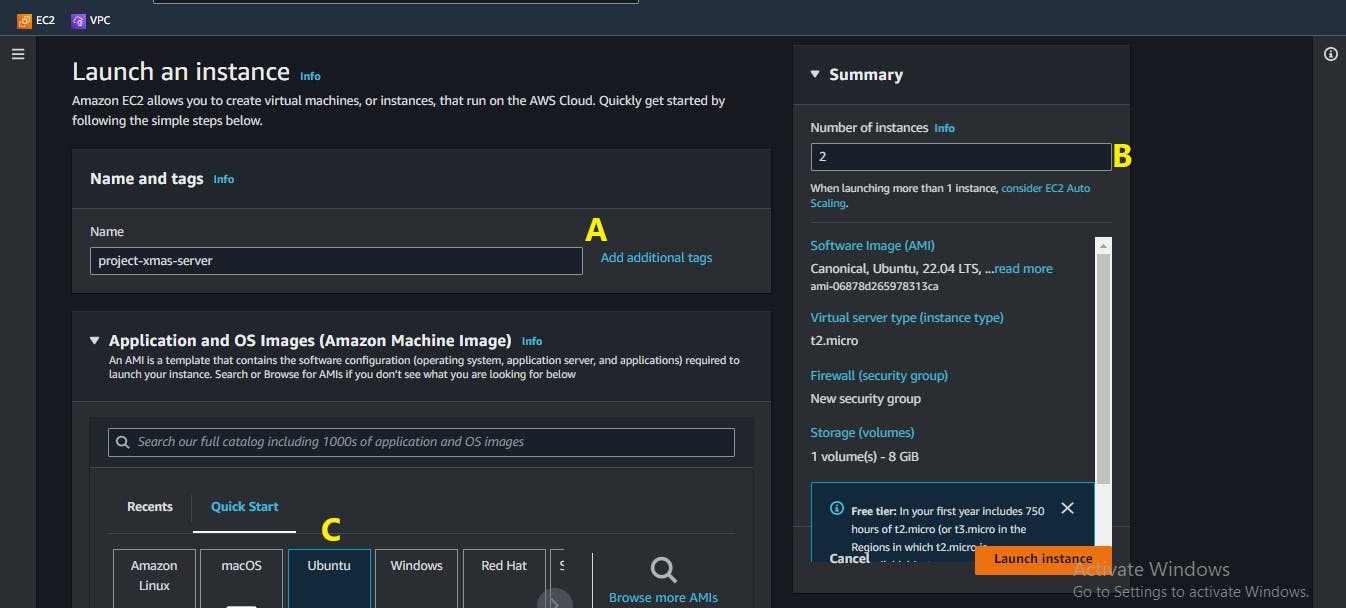
D. Generate or select a key pair.
To access the servers we're setting up, we use key-pairs, which is a method from cryptography for safeguarding data transfers during the connection process.
E. Give your key-pair a name
F. Click on the
Create key pairbuttonWhat happened here was that a
.pemfile is downloaded to your local machine. Find out where it was downloaded to and keep it in memory, we are going to need it later in this tutorial.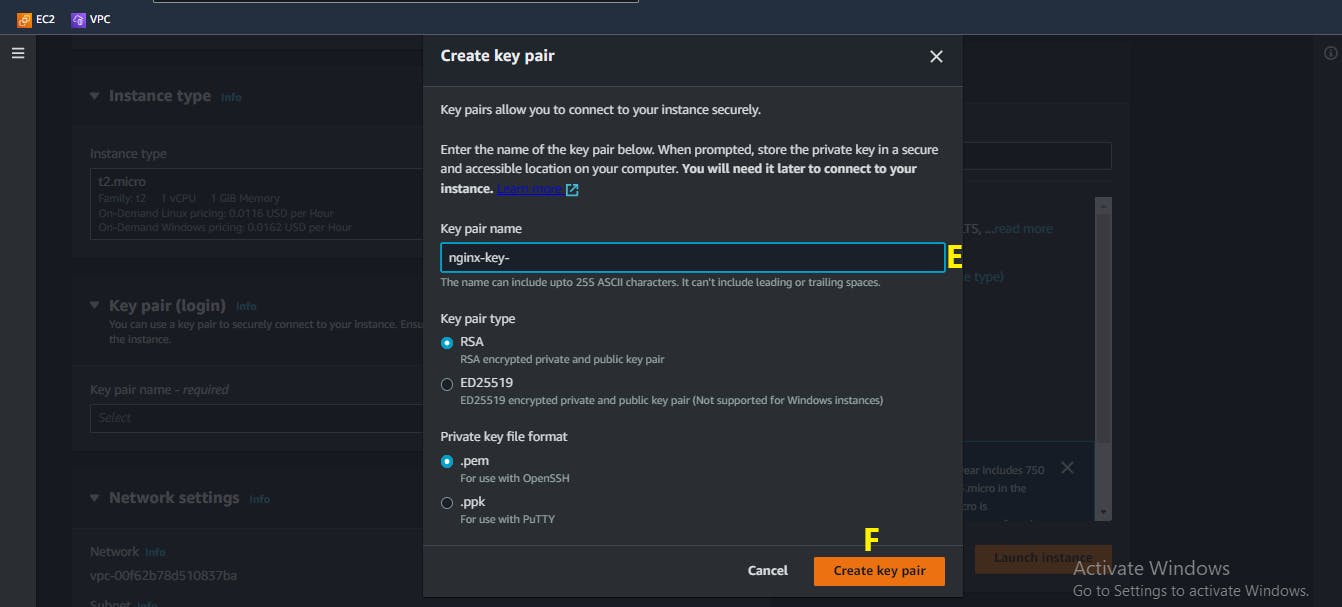
G. On the
Network settingspanel, click onEdit
H. Select the VPC we created in Step One
I. Ensure your Subnet is selected as
private1orprivate2J. Ensure that the
Auto-assign public IPis set toDisable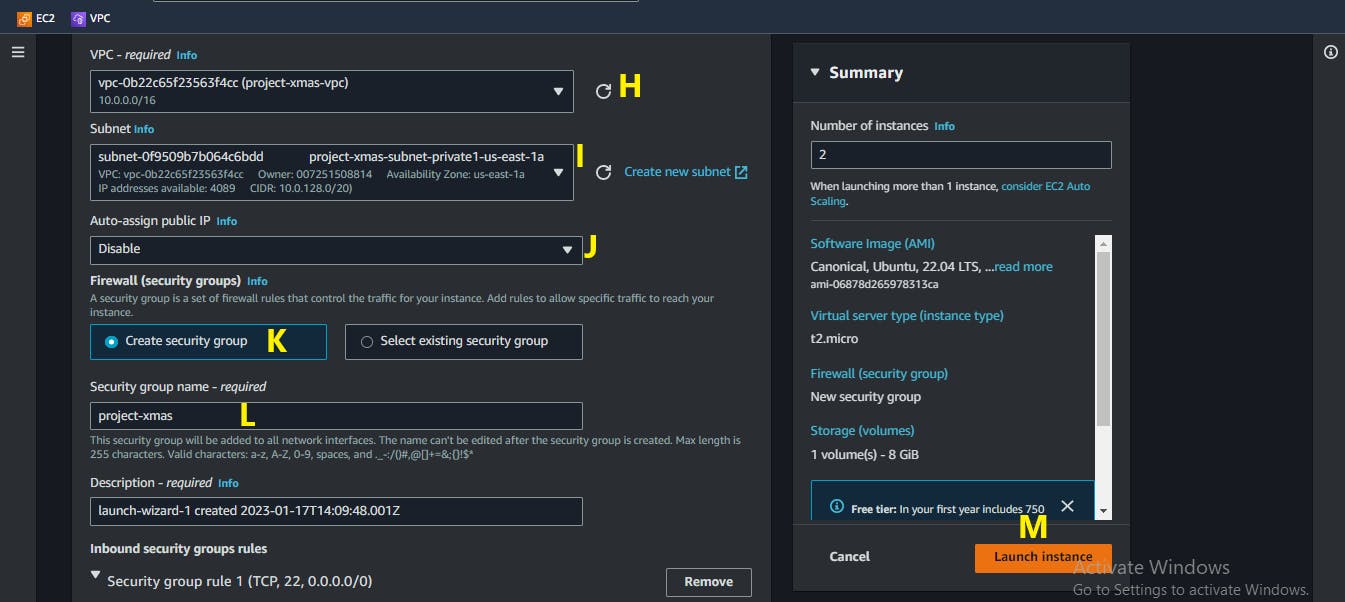
K. Create a new security group
L. Edit the name of your security group
M. Click on
Launch instance
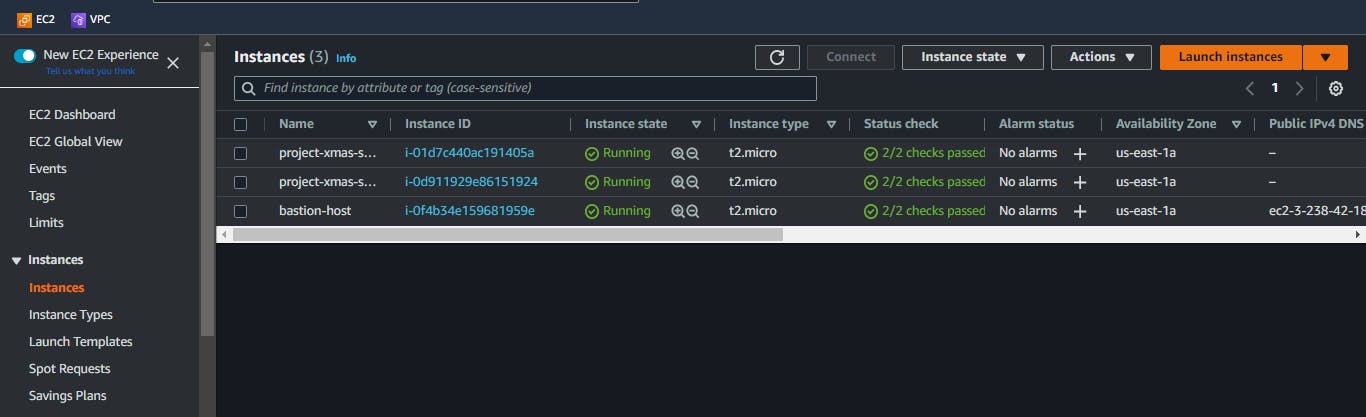
Step Three: Create a Bastion Host
A bastion host is a secure computer that acts as a gateway to a private network. In the tutorial, it is the instance that would give us access to our private instances. Configuring the bastion host is similar to the EC2 instances we configured in Step Two, except for the following:
A. Number of instances = 1
B. Select the same key-pair you generated
C. On the Network settings panel, Ensure the subnet is public1 or public2
D. Ensure that the Auto-assign public IP is set to Enable
E. Use the same security group you created in Step Two
That's all for this step.
Remember that all other steps in Step Two are the same
Step Four: Time to Connect
Remember that key pair we downloaded in Step Two? Yea, we would need it now.
Use Git Bash or any other terminal-like software
Locate the key-pair file on your local machine [Hint: It has a
.pemextension]Use
lsto list the content of the directory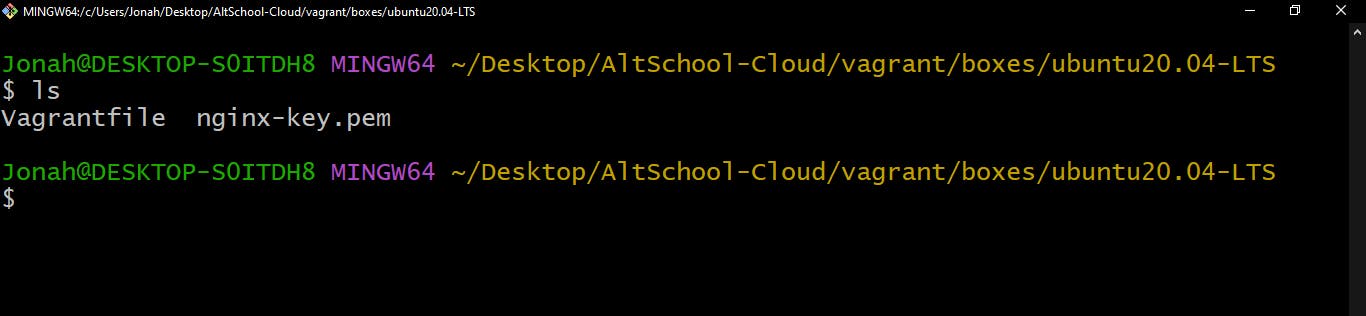
Enter this line of code:
chmod 400 <your_key_file.pem>This line of code gives the user read permission and removes all other permissions.
Display the content of the
<your_key_file.pem>filecat <your_key_file.pem>Copy the output to a simple text editor e.g. Notepad

On the Amazon EC2 console, select your bastion host's instance ID
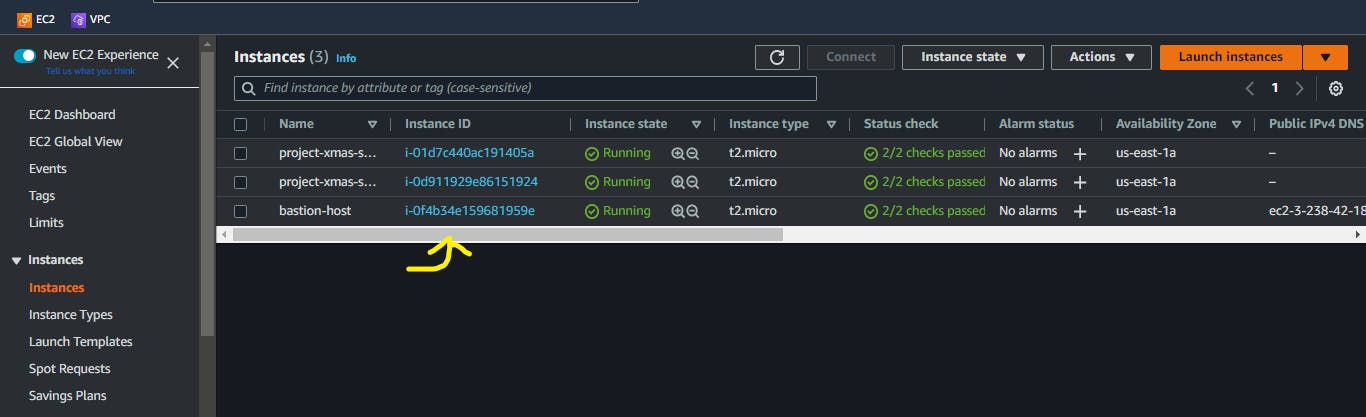
Click on the
Connectbutton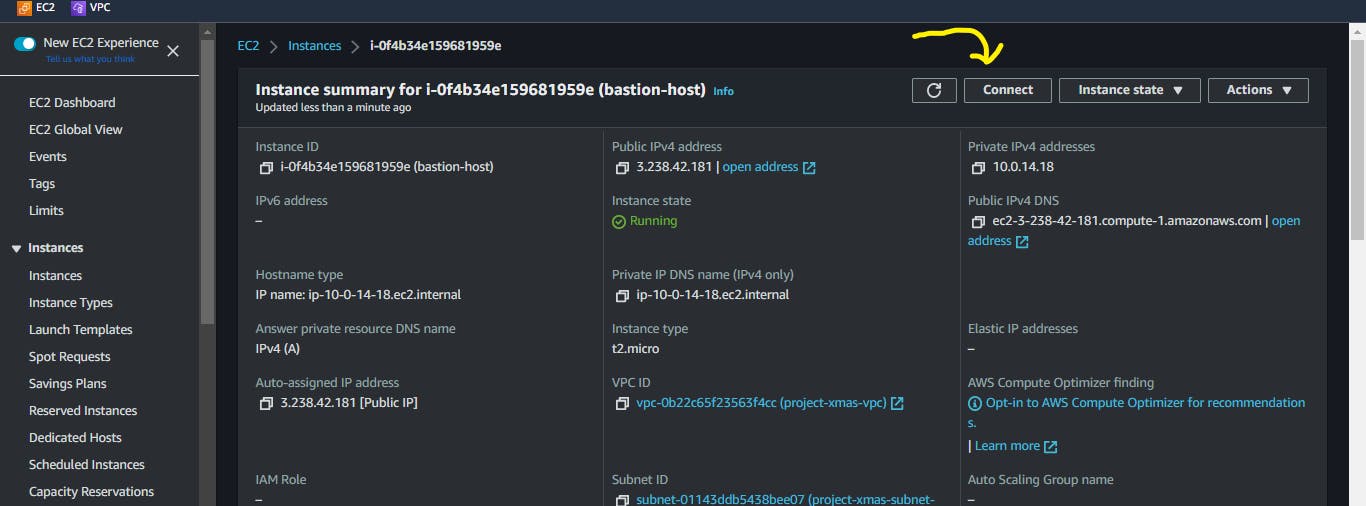
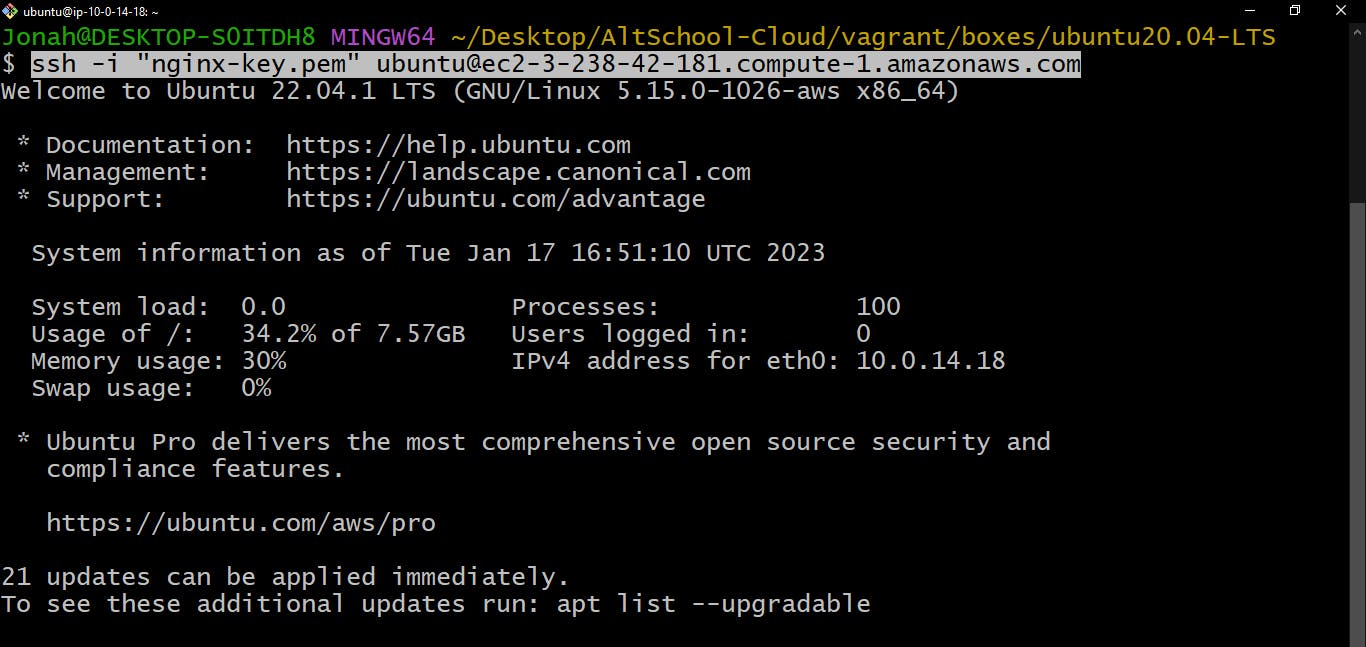
Copy the "ssh -i '<your_key_file.pem>' ...." command

SSH into your bastion host
In your bastion host, run
nano <your_key_file.pem>This opens an empty file.
Copy the key-pair code into this empty file. Recall "sub-step 4"
Save and exit.
Ctrl + OandCtrl + X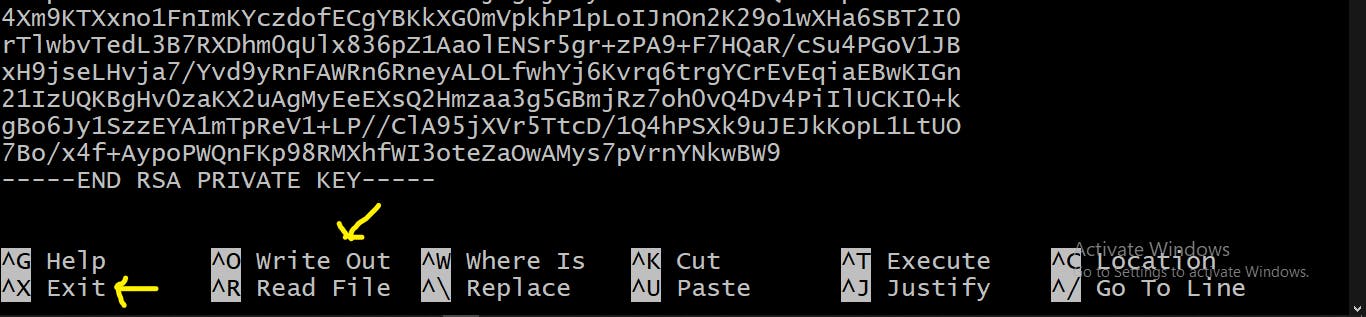
SSH into your private instances by following the instructions in sub-steps [5 - 8]
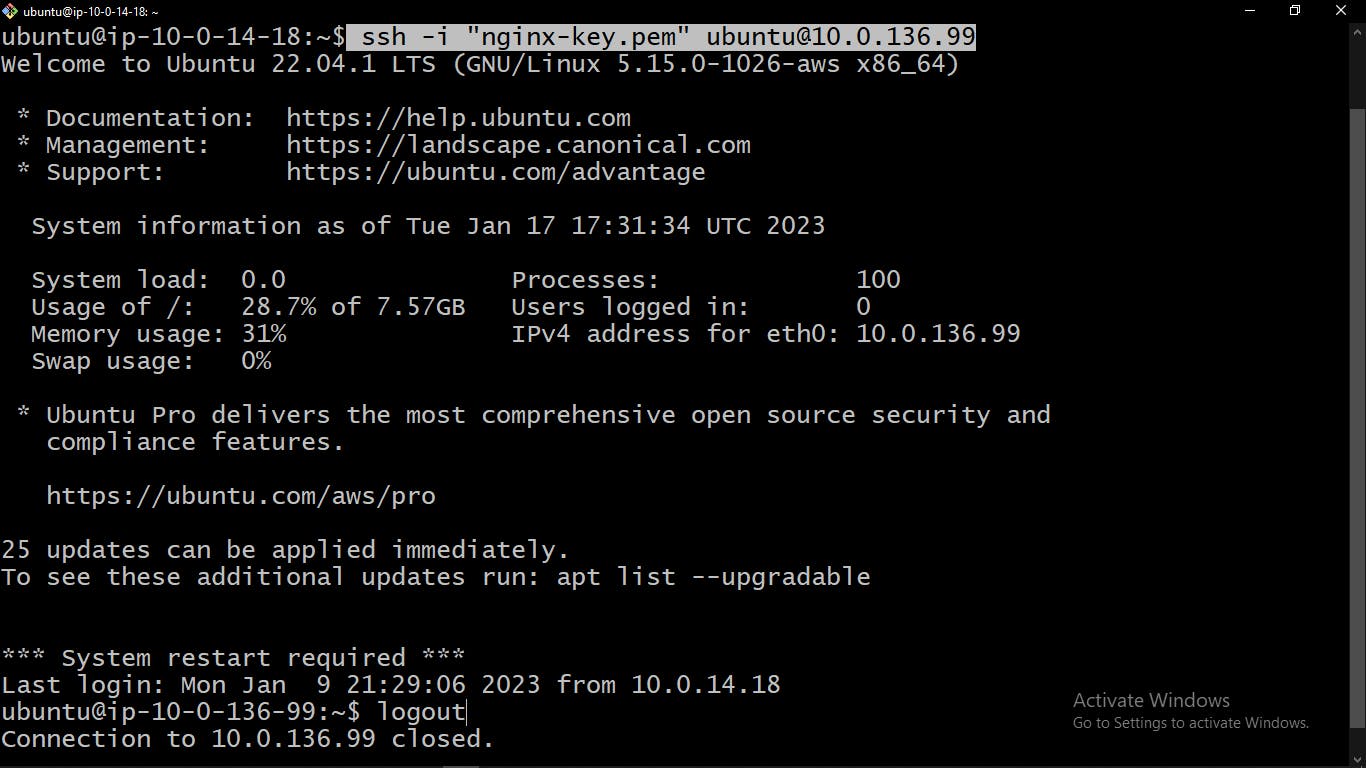
Log out of your private instances into the bastion host
Step Five: Install and Setup Ansible
Ansible allows us to do installations and configurations on several servers at the same time. But we need to install Ansible on the host machine [Bastion Host] so that we can manage the private instances.
Update local package index.
sudo apt updateInstall Ansible.
sudo apt install ansible -yCreate a
ansible.cfgfilenano ansible.cfg # Create fileEdit
ansible.cfgInventory : A file that is used to store the ip addresses of the managed servers you want your commands to run on
 [defaults]
 inventory = hosts
 private_key_file = ~/your_key_file.pem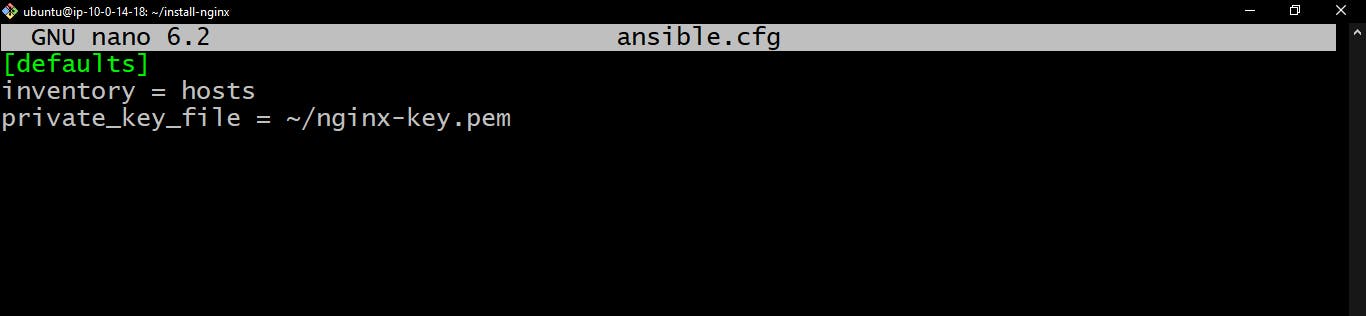
Save and exit.
Note:
hostfile has not been created yet. We would create it in the next step.Create your
hostsfile and add the ipv4 address of your private instances.nano hosts[server1] 10.0.136.99 [server2] 10.0.136.118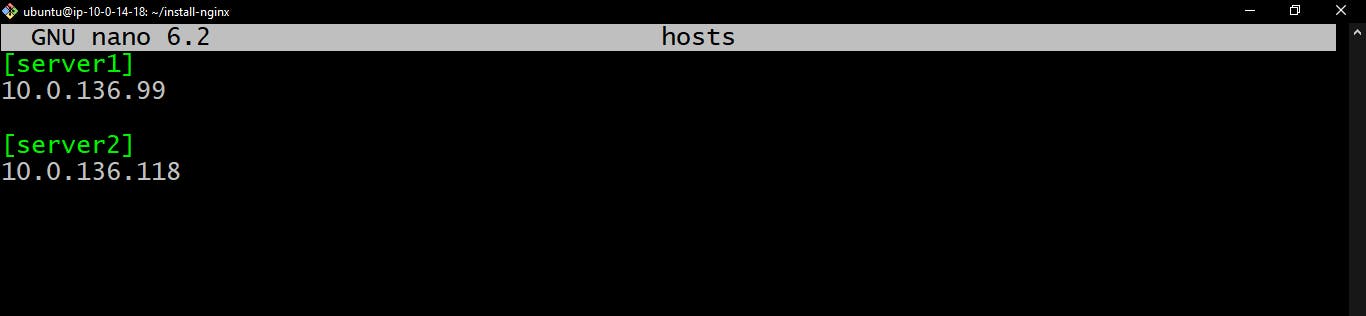
Save and exit.
Create and edit the ansible playbook
Playbooks are files that contain the commands to be run. They are written in YAML (YAML Ain't Markup Language) - a recursive acronym. Playbooks are used to automate the deployment, configuration, and management of software on remote systems. They are organized into a series of tasks, which can include things like installing software, creating users and groups, and copying files.
nano site.yml--- - name: Provisioning Nginx web server hosts: all become: yes roles: - nginx # nginx is a role that we have not created yet
Save and exit.
Make sure the files we just created are on the same level.
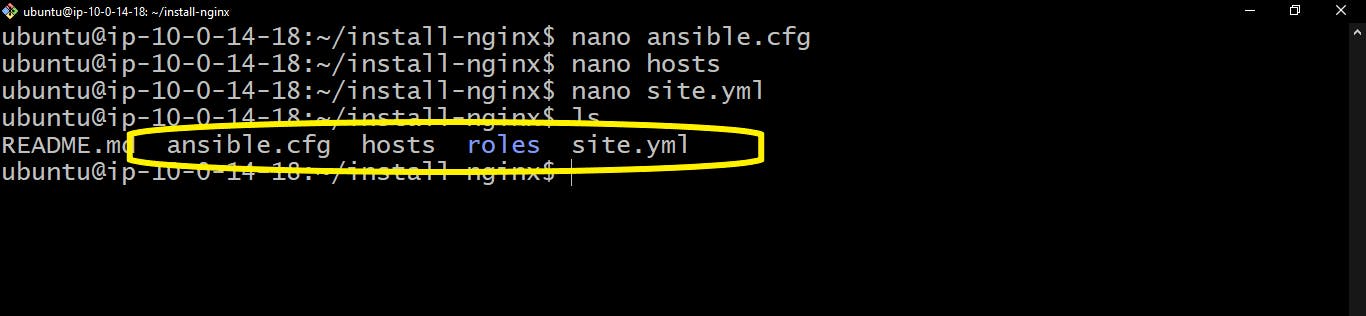
Create a
roles/directorymkdir roles; cd rolesUse roles to organize your playbooks into smaller, more manageable units. Roles can be reused across multiple playbooks and make it easier to share and collaborate on code. It is considered best practice to use roles in ansible. If you want to know more about it, you can check out the Ansible documentation and you can also learn about the best practices in Ansible.
Create a new role directory structure with
ansible-galaxyRemember to give it the same name as it is in the
site.ymlplaybook, in our case, that isnginxansible-galaxy init nginx; cd nginxIf you list out the files and directories in the
nginxdirectory, you will see a structure similar to this image.
Write a bash script that would display the hostname of each private on the browser.
cd files/; nano index.nginx-debian.shecho "<h1>This is my server $(hostname -f)</h1>" > /var/www/html/index.nginx-debian.htmlSave and Exit.
Write the tasks playbook
cd ../tasks; nano main.yml--- # tasks file for nginx - name: Update the servers command: apt update - name: Install Nginx apt: name: nginx - name: Sending and execute bash script files to servers script: index.nginx-debian.shWrite the handlers.
Handlers are a type of task that are used to perform actions based on the state of other tasks. In this case, we would need to restart Nginx so that the configurations can "stick".
cd ../handlers
nano main.yml
--- # handlers file for nginx - name: Restart nginx service: name: nginx enabled: yes state: restartedRun the playbook
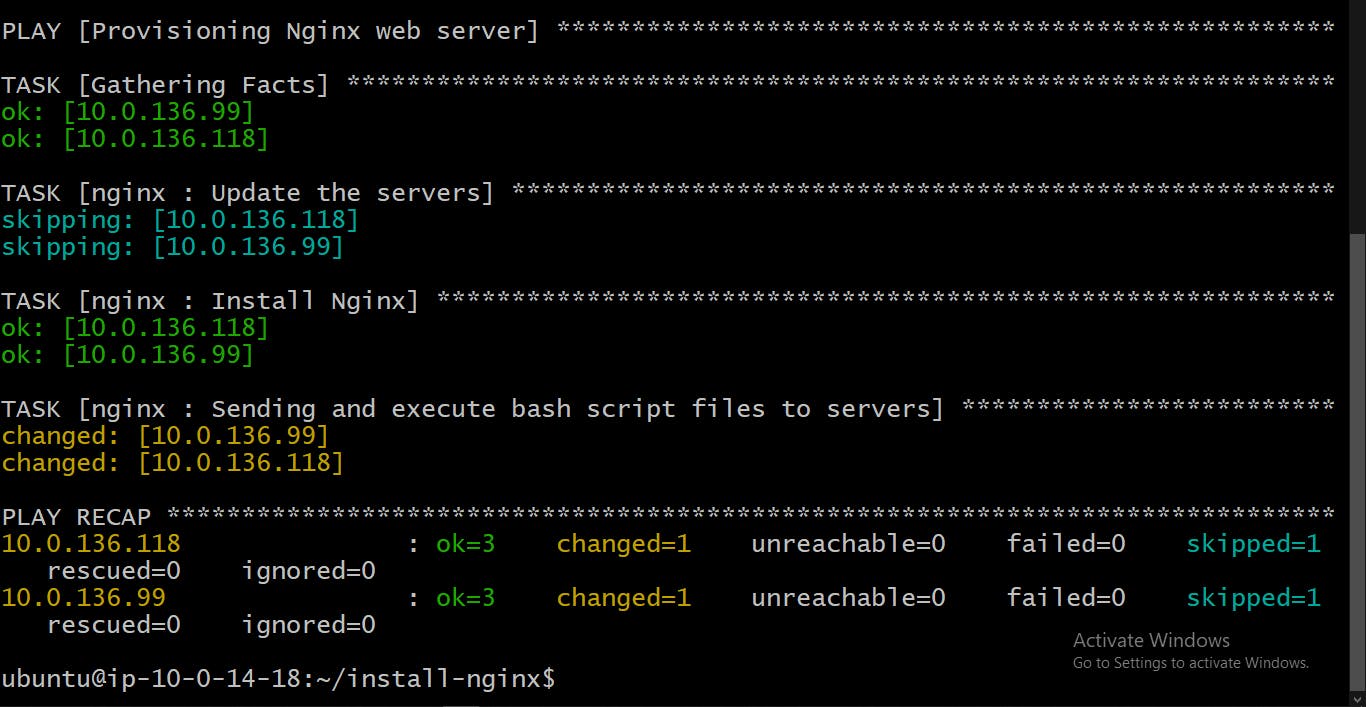
To run the playbook, let's go back to where we have the
hostsfile andsite.ymlplaybook.cd ../../../ansible-playbook -i hosts site.ymlOutput:
Step Six: Create Target Groups
We are back to the AWS EC2 Console.
Scroll down on the left sidebar to find and click on
Target Groups.Click on
Create target group
Select instances as the target type and give the target group a name.

Select the VPC we created earlier.
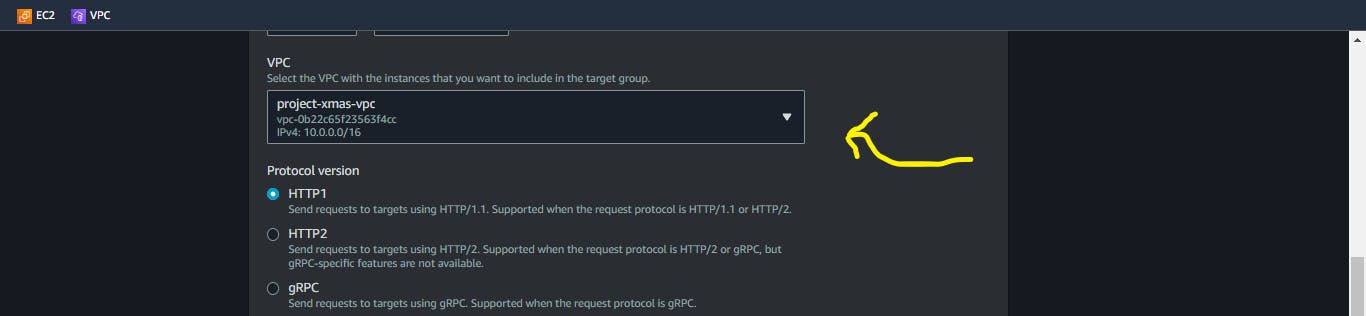
Click on next

Select the Private instances in your VPC and click on
include as pending below.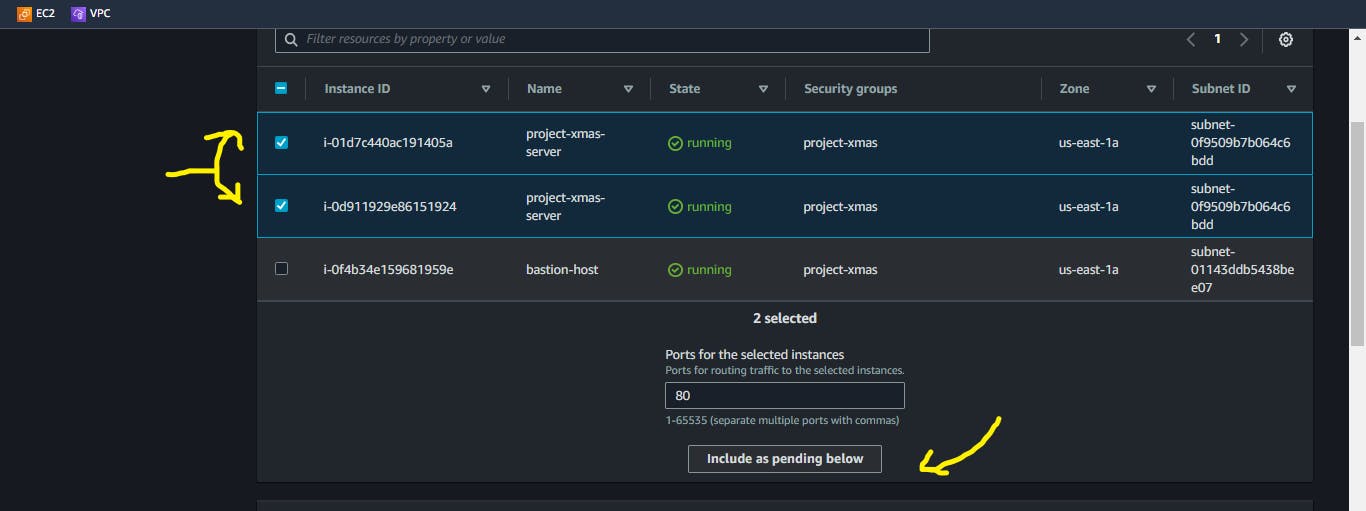
Click on
Create target group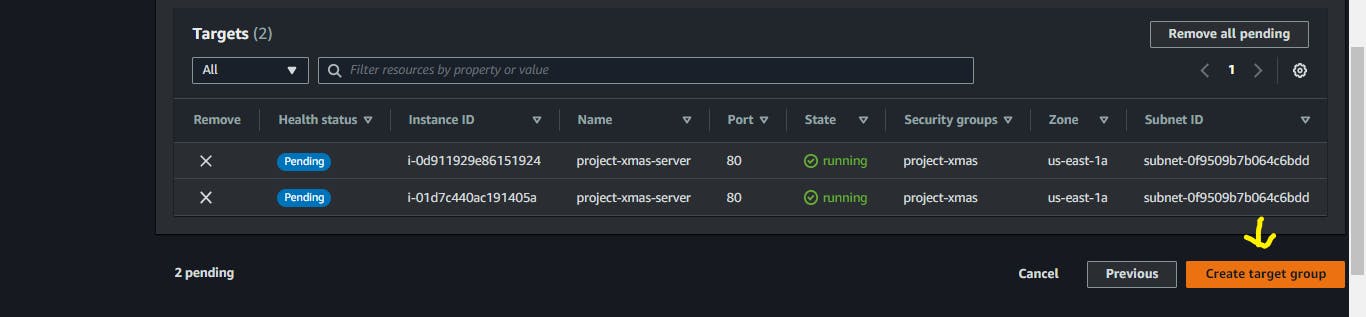
Go to the
Target Groupspage, Selectnone associatedunder theLoadbalancercolumn. Since we do not have a load balancer attached to the target group we created.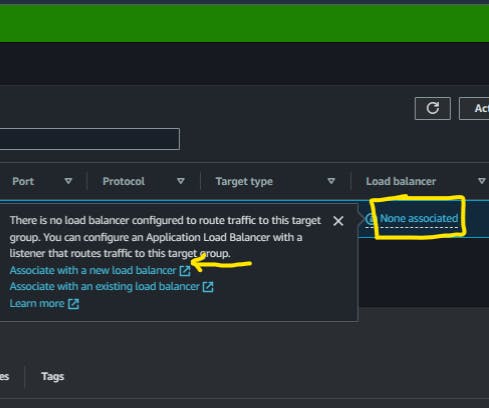
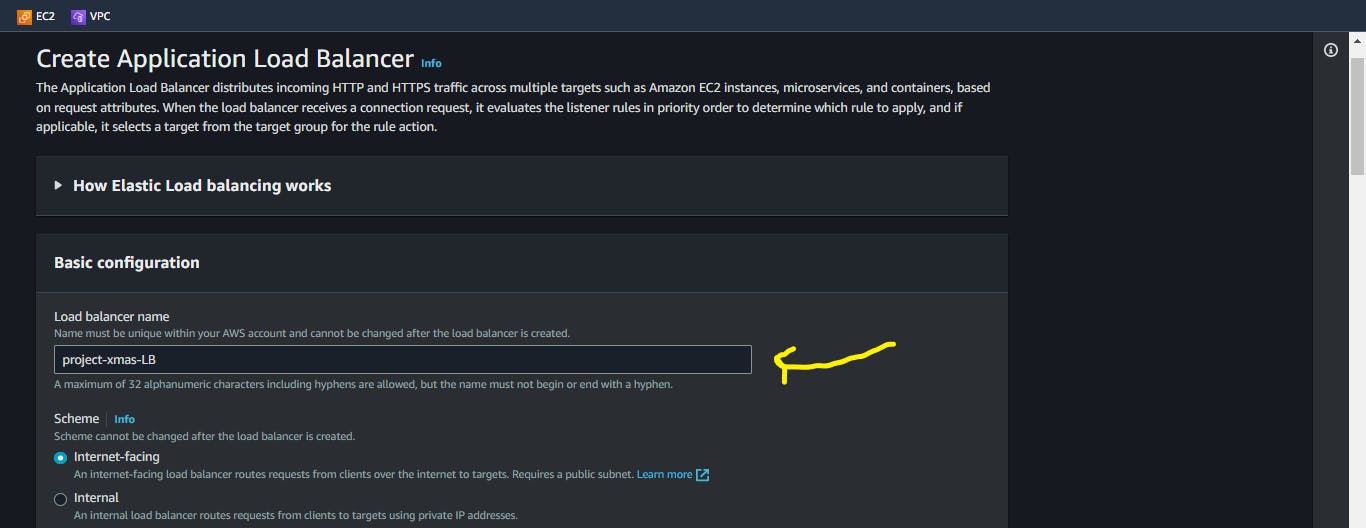
Step Seven: Create an Application Load Balancer
A load balancer evenly distributes incoming internet traffic among multiple servers to prevent overloading and improve system performance and stability.
Give your Application Load Balancer a name
On the
Network Mappingpanel, select your VPC, and choose the public subnets associated with your VPC.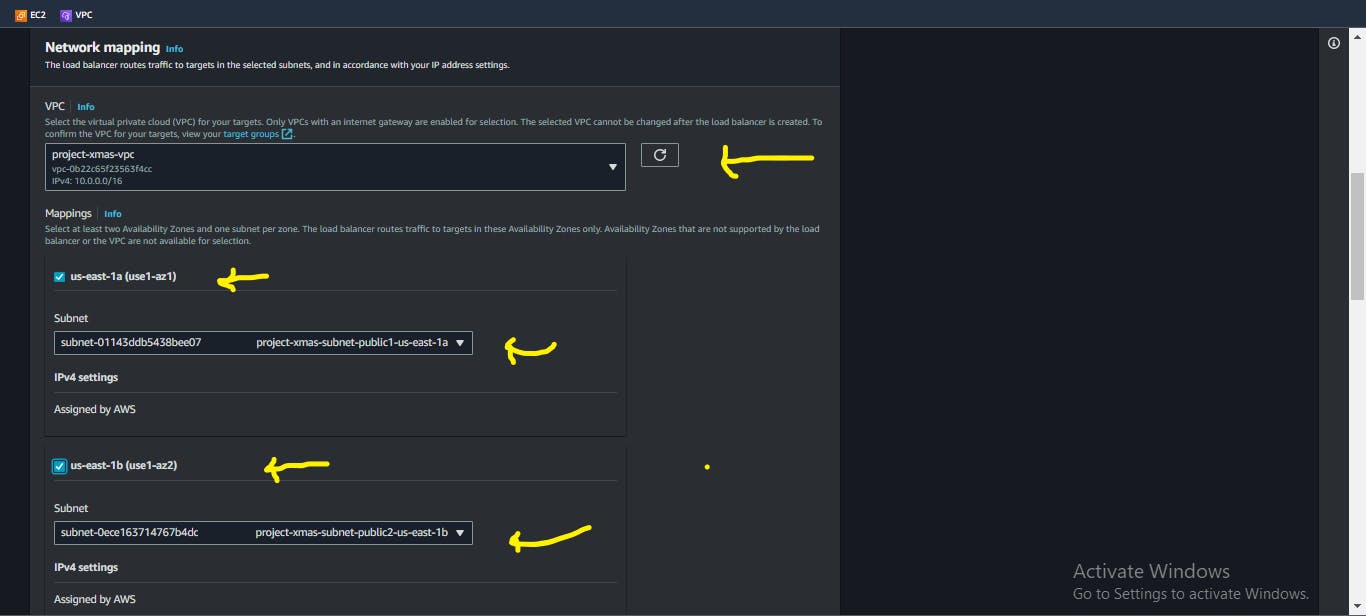
Create a new Security Group

Give your Security Group a name, and brief description, and ensure you choose your created VPC from the drop-down menu.
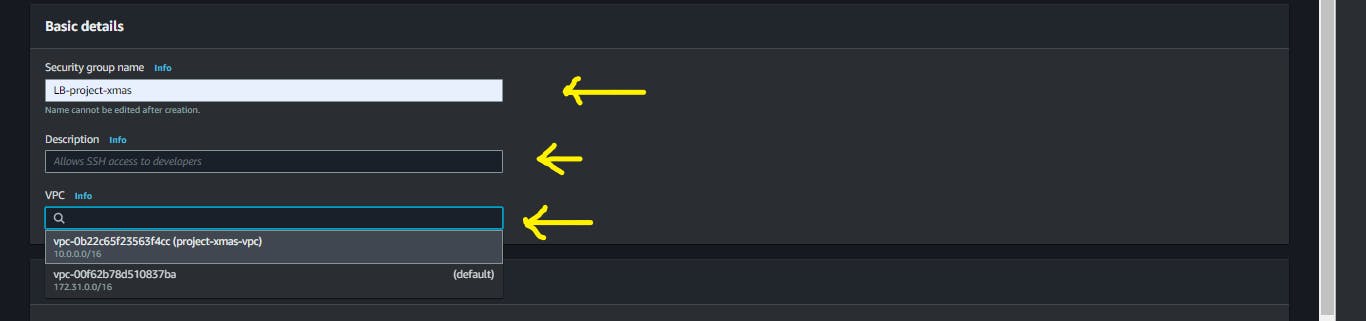
Edit the Inbound rules to allow HTTP and Https traffic from anywhere. Click on create and return to the previous page to assign the newly created Security Group.
You can also do this for http and https [IPv6]

On the
Listeners and routingsection, Choose the target group that was made earlier, and then proceed to create load balancers while keeping the rest of the settings at their default values.
Step Eight: Configure the Instance Security Group to direct to the Load Balancer
Navigate to the
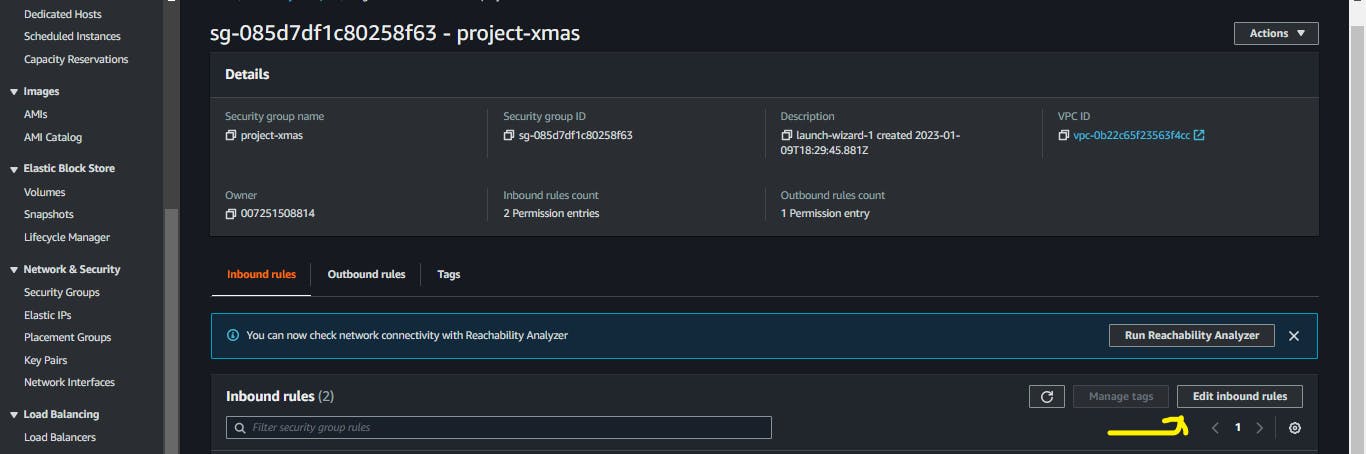
Security Grouppage, select the security group associated with your instances.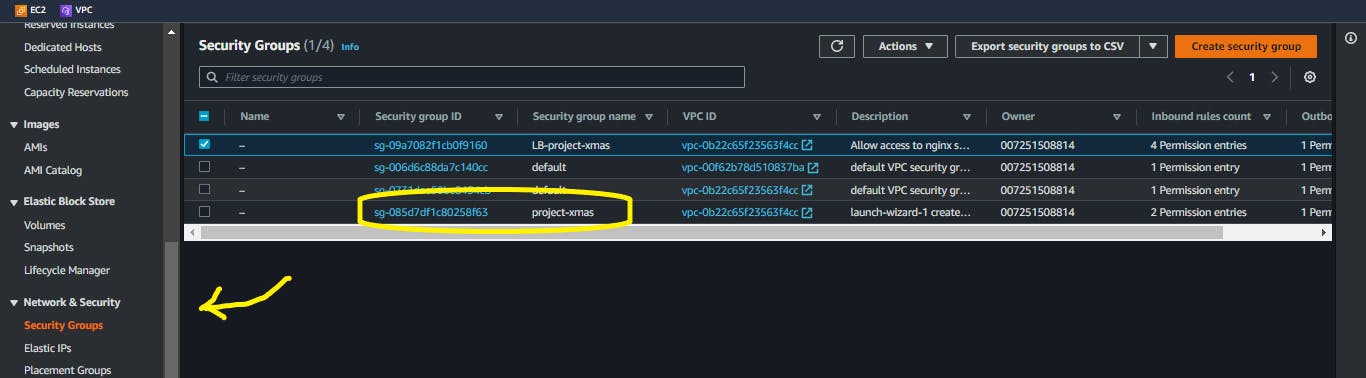
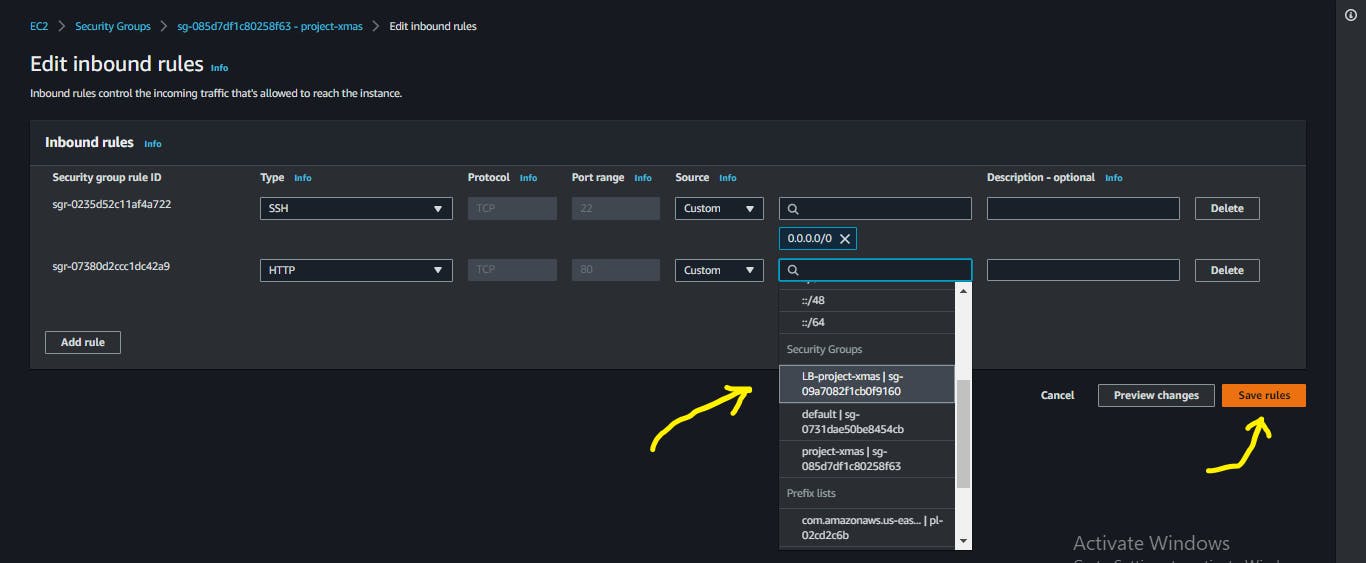
Edit the inbound rules to allow traffic on only the load balancer by selecting the Security Group that is associated with the load balancer. Save the rules.
Confirm the health status of your instances, if it is unhealthy, restart your Nginx servers
sudo systemctl restart nginx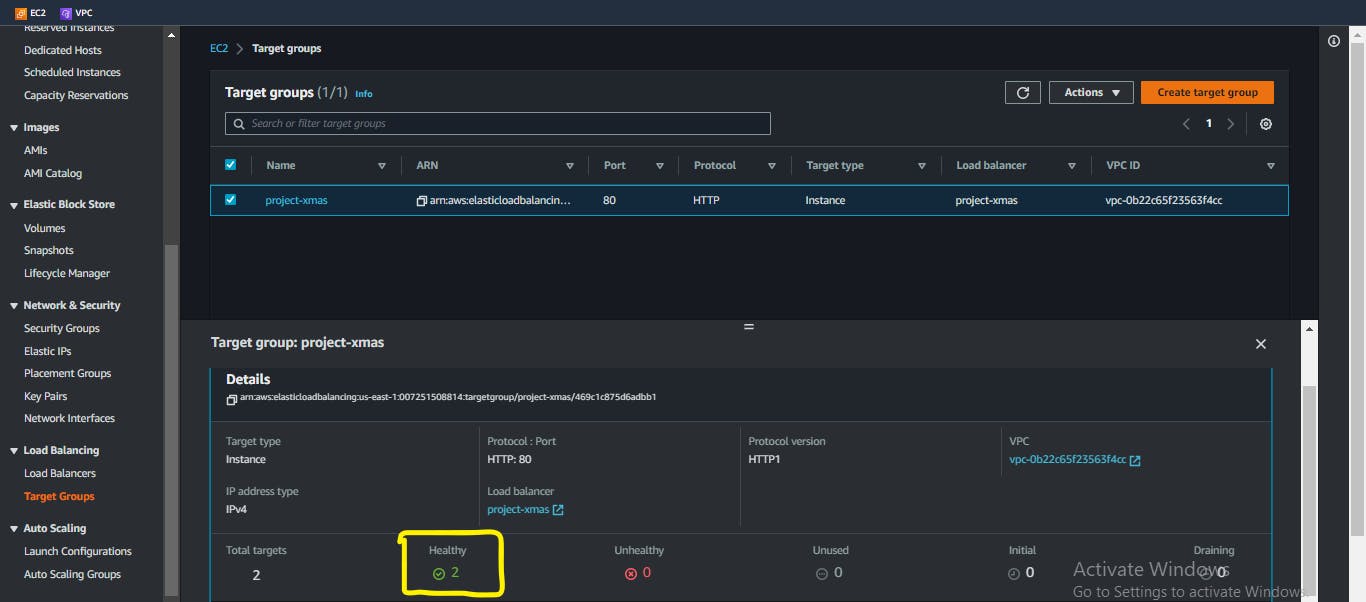
Time for magic!
Go to your load balancer page and copy its DNS name, paste it on your browser and keep reloading.
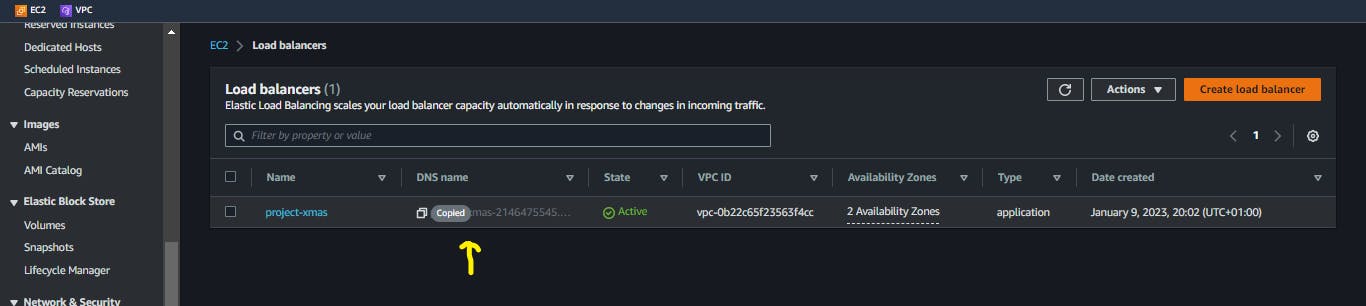
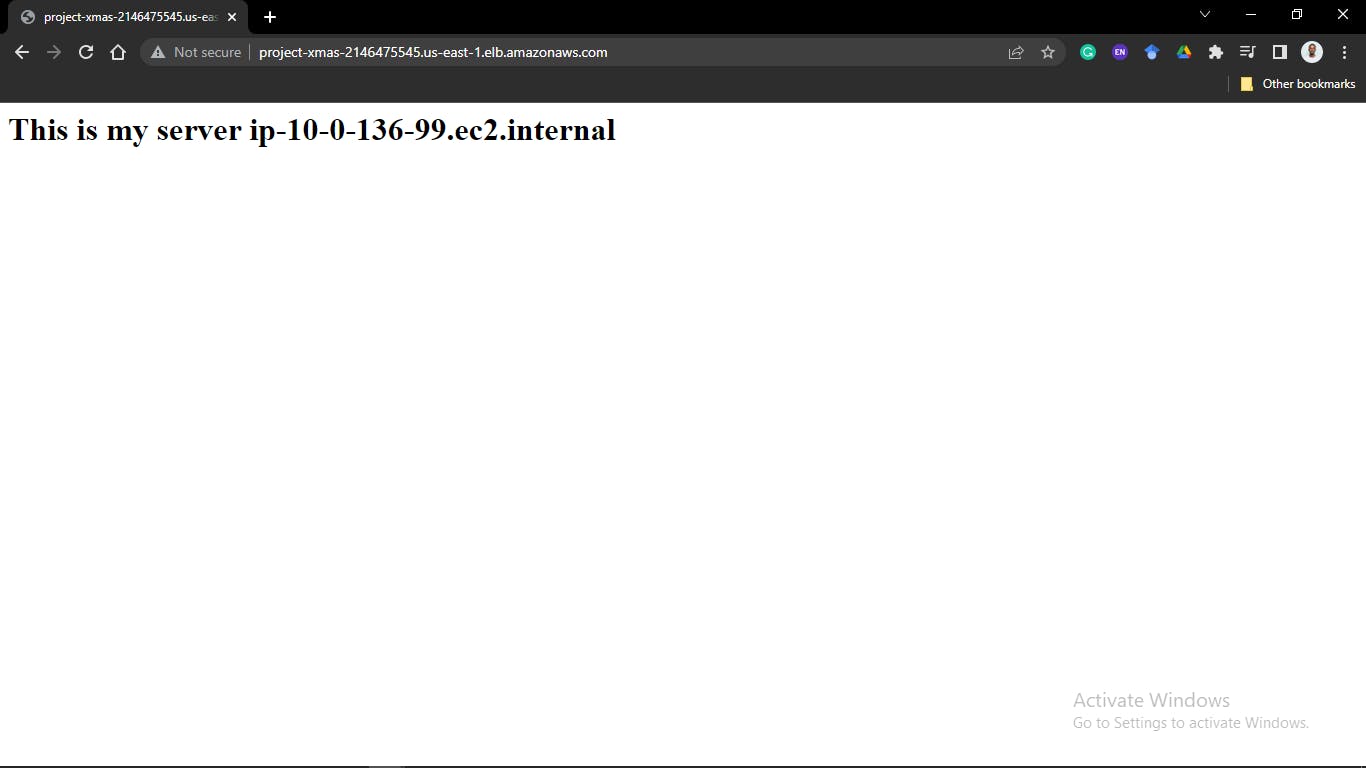
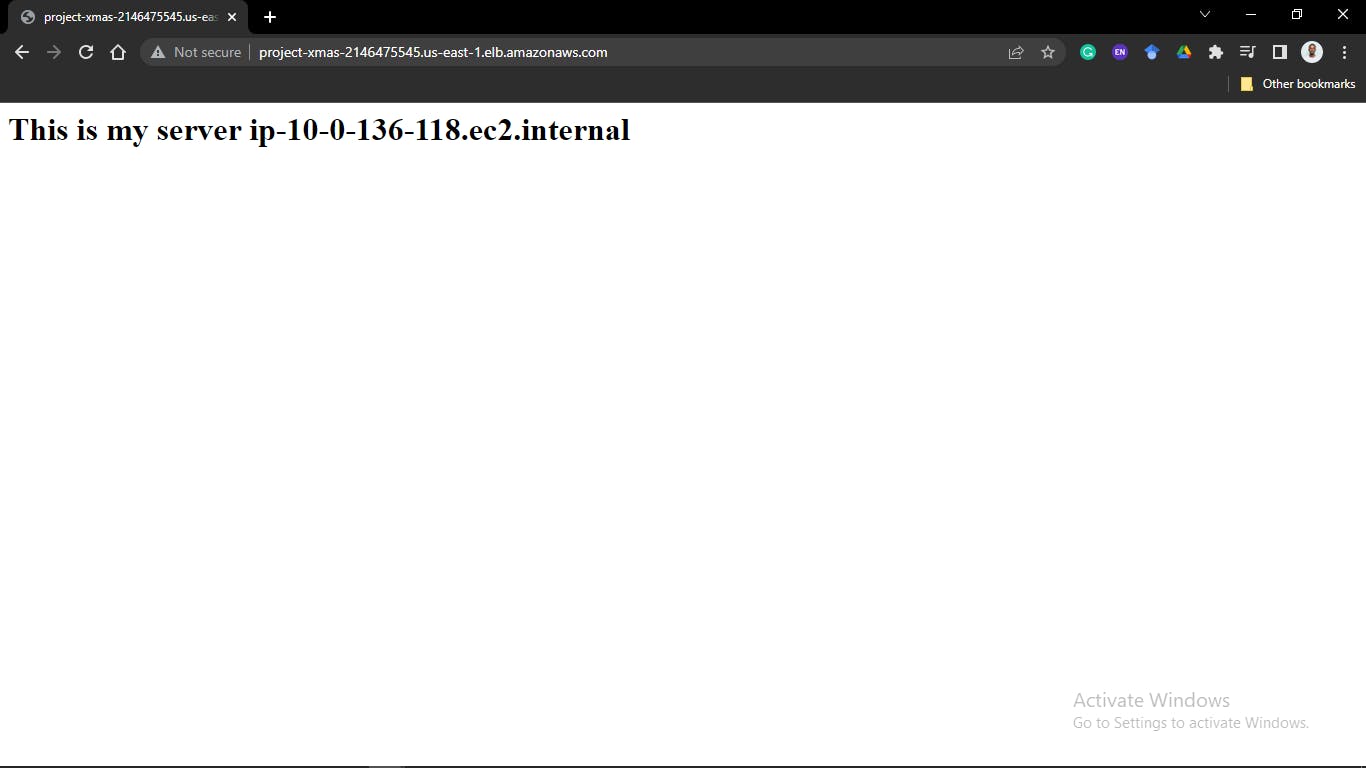
The page keeps switching between your two private instances.
Conclusion
This setup helps reduce the workload on the individual servers by directing traffic between servers. It can be scaled to cater to multiple servers at once, thereby reducing the risk of downtime for maintenance.
For more information about some of the concepts discussed here, check out:
and many others.
You can also check out my ansible playbook for reference
Credits
Arigato!